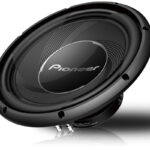
To test the receiver subwoofer output, connect your subwoofer to the receiver’s subwoofer output and play audio content specifically designed for low-frequency testing. Make sure to adjust the volume and settings on both the receiver and subwoofer for an optimal listening experience.
To ensure that your audio system delivers powerful and accurate bass, it is essential to test the receiver subwoofer output. By following a few simple steps, you can assess the performance of your subwoofer and make any necessary adjustments for an immersive audio experience.
We will guide you on how to accurately test the subwoofer output of your receiver, enabling you to fine-tune your audio system and enjoy deep, rumbling bass in your favorite movies, music, and games. So, let’s dive in and discover the methods to test your receiver’s subwoofer output.
Understanding The Importance Of Testing
Testing the receiver subwoofer output is essential to ensure optimal audio quality. The subwoofer output plays a crucial role in enhancing the overall audio experience. A well-tested and calibrated subwoofer output delivers deep bass frequencies with clarity, creating a more immersive soundstage.
By testing the receiver subwoofer output, you can identify any potential issues or weaknesses in the audio system. This allows you to make adjustments and optimize the performance, resulting in a more balanced and accurate sound reproduction. Incorrectly calibrated subwoofer output can lead to muddy or boomy bass, overpowering other frequencies and distorting the audio quality.
Moreover, a properly tested subwoofer output ensures that your audio system is compatible with different audio sources and content types. Whether you are watching movies, playing music, or gaming, you want to experience the intended sound effects and deep bass impact. Testing the receiver subwoofer output helps in achieving this, ensuring a satisfying audio experience across various media.
Equipment Needed For Testing
Testing the output of a receiver subwoofer is crucial to ensure optimal sound quality. To accurately test the subwoofer output, you will need the right equipment. Here are the essential tools:
- Audio cables: Use high-quality cables to connect the subwoofer to the receiver. This ensures a reliable signal transfer.
- Subwoofer cable: A specific subwoofer cable is necessary to transmit low-frequency audio signals to the subwoofer.
- Audio amplifier: An amplifier helps boost the subwoofer signal and power it adequately.
- Microphone: Use a calibrated microphone to measure the audio output accurately.
- Audio interface: An audio interface allows you to connect the microphone to your computer for analysis.
- Audio measurement software: Utilize software that can measure and analyze the subwoofer output levels.
By having these necessary tools, you can perform precise tests on your receiver subwoofer output and ensure an immersive audio experience.
Step-By-Step Guide To Testing Receiver Subwoofer Output
In this step-by-step guide, we will walk you through the process of testing the receiver subwoofer output. Connecting the subwoofer to the receiver is the first step. Make sure to use the appropriate cables and connect the subwoofer to the designated subwoofer output on the receiver.
Once connected, adjust the settings on the receiver. Access the audio settings menu on the receiver and look for the subwoofer settings. Make sure the subwoofer output is enabled and adjust the volume and crossover settings to your preference.
Next, set up a test tone. The receiver may have a built-in test tone generator. Access the audio settings menu again and look for the test tone option. Activate the test tone and play it through the subwoofer. This will help you determine if the subwoofer is producing sound accurately.
For precise measurements, consider using a sound level meter. Place the sound level meter at your listening position and adjust the subwoofer volume until you achieve the desired sound level.
| Step | Description |
|---|---|
| 1 | Connect the subwoofer to the receiver using appropriate cables. |
| 2 | Adjust the settings on the receiver, enabling the subwoofer output and adjusting volume and crossover settings. |
| 3 | Set up a test tone by accessing the audio settings menu and activating the test tone. |
| 4 | Use a sound level meter to achieve precise measurements. |
Common Issues And Troubleshooting
If you are experiencing issues with the subwoofer output of your receiver, there are a few common problems that you can troubleshoot. One common issue is the lack of sound coming from the subwoofer. This can be caused by incorrect settings or faulty connections. Make sure that the subwoofer is properly connected to the receiver and that it is powered on. Additionally, check the settings on the receiver to ensure that the subwoofer output is enabled and set at an appropriate level. Another issue to watch out for is distorted or low-quality output from the subwoofer. This can be caused by a variety of factors, such as improper crossover settings or a damaged subwoofer. Adjust the crossover settings on your receiver to ensure that the subwoofer is receiving the correct frequencies. If the problem persists, you may need to replace the subwoofer or have it repaired. Lastly, interference or hum can also affect the subwoofer output. This can be caused by nearby electronic devices or poor grounding. Move any electronic devices away from the subwoofer and check the grounding of both the receiver and the subwoofer. If necessary, use a ground loop isolator to eliminate any unwanted interference. By troubleshooting these common issues, you can ensure that your receiver’s subwoofer output is working properly and enjoy enhanced audio quality for your entertainment setup.
Tips For Optimizing Subwoofer Output
Placing the subwoofer in the ideal position is crucial for optimizing its output. **Experiment with different locations** to find the spot that delivers the best bass response. Avoid placing it in corners or against walls as this can cause boomy or muddy sound. Instead, try positioning it slightly away from walls or near the front of the room for better dispersion.
In addition to placement, don’t forget to adjust the crossover settings. **Matching the subwoofer’s crossover frequency with that of your speakers** ensures a smooth transition between the two. Set the crossover point to around 80Hz, which is commonly recommended for most setups.
Furthermore, **calibrating the subwoofer levels** is essential for achieving balanced sound. Use a sound meter or an app to measure the output of the subwoofer and adjust it accordingly. **Keep in mind that overloading or overpowering the subwoofer can result in distortion**. Begin by setting the volume to about 75% and make fine-tuning adjustments as needed to achieve the desired level of bass.
Advanced Techniques For Testing Subwoofer Output
Advanced Techniques for Testing Subwoofer Output
When it comes to testing subwoofer output, there are a few advanced techniques that can ensure accurate results. One effective method is multichannel sound testing, which allows for a comprehensive assessment of the subwoofer’s performance across different audio sources.
Utilizing audio calibration software is another valuable approach to obtain precise measurements. This software provides analysis tools and test tones that can help identify any potential issues with the subwoofer’s output, such as distortion or frequency response irregularities.
By using audio calibration software, you can also fine-tune the subwoofer’s settings to optimize its performance. This may involve adjusting the crossover frequency, gain, and phase settings to achieve the desired sound quality.
Overall, employing multichannel sound testing and audio calibration software can significantly enhance the accuracy and reliability of subwoofer output testing. These advanced techniques empower audio enthusiasts and professionals to achieve the best possible audio experience.
Conclusion
Determining the output of your receiver’s subwoofer requires some simple yet effective tests. By following the steps outlined in this blog post, you can ensure that your subwoofer is functioning correctly and delivering optimal audio quality. Remember to adjust the settings, conduct a sound test, check for any connectivity issues, and consider seeking professional assistance if needed.
By taking these measures, you can enjoy the full potential of your subwoofer and enhance your overall audio experience.
Frequently Asked Questions On How To Test Receiver Subwoofer Output
How Do I Test The Output Of My Receiver Subwoofer?
To test the output of your receiver subwoofer, start by connecting it to your receiver using the appropriate cables. Set the receiver’s volume to a moderate level and play a bass-heavy audio source. Listen for balanced, clear, and powerful bass sounds.
You can also adjust the subwoofer settings to optimize its performance.
Why Is The Subwoofer Output Not Working On My Receiver?
If the subwoofer output is not working on your receiver, check the connections between the subwoofer and the receiver. Ensure that the cables are securely plugged in and that the subwoofer is powered on. You may also need to adjust the receiver’s settings to enable the subwoofer output or troubleshoot any potential issues with the subwoofer itself.
How Can I Troubleshoot Low Or No Sound From My Receiver Subwoofer?
To troubleshoot low or no sound from your receiver subwoofer, first check the volume levels on both the receiver and the subwoofer itself. Make sure they are set to an appropriate level. If the issue persists, try connecting the subwoofer to a different audio source to determine if it’s a problem with the receiver.
Additionally, inspect the cables and connections for any damages or loose connections.
What Should I Do If My Subwoofer Output Is Distorted?
If your subwoofer output sounds distorted, start by checking the audio source and ensure it is not distorted. If the problem persists, adjust the crossover settings on your receiver to fine-tune the frequency range sent to the subwoofer. Experiment with different settings to find the best balance for your audio setup.
Additionally, ensure that the subwoofer and receiver are compatible in terms of power requirements.


